


Chapter 0:
The Ultimate Guide to Shoulder Pain Rehab

This guide is the perfect resource for anyone who struggles with shoulder pain and wants to learn how to fix it on their own. It's also a necessary tool for the coach or fitness trainer who works with people that deal with shoulder pain.
The Ultimate Guide to Shoulder Pain Rehab creates a better understanding of the causes of shoulder pain and lays out a strategy to get past it.
About the Ultimate Guide to Shoulder Pain Rehab
You don't need an advanced medical degree to understand why your shoulder hurts and what you need to do to fix it. If you struggle with shoulder pain, there is a good chance you can successfully improve how your shoulders feel and move with this plan of attack (even pain that's bothered you for years, and that's without drugs or surgery!)
The Ultimate Guide to Shoulder Pain Rehab is based on medical principles and will apply tactics used by physical therapists everywhere. However, it's essential to understand, every condition is different, and some may need to get more advanced medical help for their shoulder problem (which you will determine with a self-screen as part of this guide.) Regardless, this guide will allow you to become more active in managing your health, which is vital in correcting the issue.
What You Will Learn
The Build- An understanding of the shoulder makeup will help you understand where the trouble lies and what you need to do to fix it. Anatomy and movement can be complicated, but we will break it down into simple pieces and avoid medical terms to keep things clear.
The Breakdown- There are a few key places that shoulder pain often occurs. This will answer the questions of how and why behind shoulder pain.
The Fix: With a better understanding of the shoulder and its pain points, you're now ready to set up a corrective plan to fix it. If you can build a plan and make it happen, you will be on the road to success.
We've organized the plan with this blueprint in mind, and each layer should provide a deeper understanding of the ultimate goal– to end shoulder pain. The guide is set up for easy navigation to jump around, but if you're unsure about your pain issue, we recommend that you go through the chapters in order.
The body can be complex, especially when it comes to pain, so take your time on each step to read and study the material. It may take a few read-throughs for things to set in.
Now... Let's Get Started
Chapter 1:
Intro to Shoulder Pain Rehab

Take some time to get to know your shoulder.
With a general understanding you’ll be ready to dive deeper into why it hurts and ways to fix it.
Shoulder Anatomy– “The Framework”
First, get to know the bones of your shoulder. They are the scaffolding that supports the entire structure, similar to a wood frame for a house.

The spine and rib cage create the shoulder foundation.. While technically these structures are not the shoulder, they do add a ton to its structure and movement.
You can easily feel the impact that the spine has on your shoulders by slumping your chest forward as far as you possibly can and then lifting your arms as high as you can overhead. You’ll notice that they get stuck earlier versus sitting tall with the chest up and spine extended.
The same goes with rotation. Look over your shoulder and try to reach something you see without turning your shoulders. You’ll have much greater success with the range of motion achieved by rotating your spine.
Thus, you need your spine to extend, bend, and rotate to accomplish the many different movement tasks demanded of the shoulders. This becomes especially important in sports and workouts that require greater speeds and heavy loads.
The big take-home is that often the shoulder relies on the body's posture to put it in a position to work most effectively. But for the classic shoulder bones, it comes down to three that make up the joint.
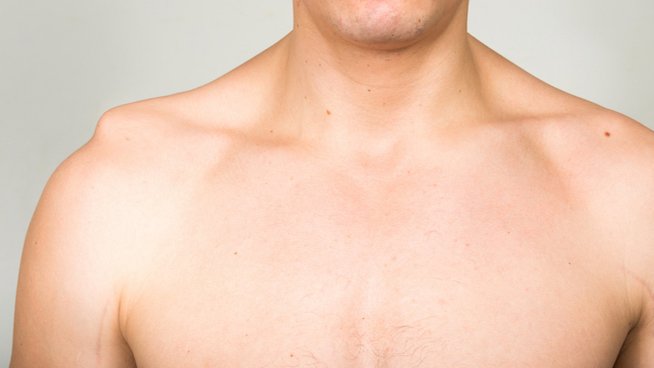
1. The Clavicle
Next on the list of supportive bones is the clavicle.
This creates a support beam to the shoulder and is the one bony attachment of the shoulder complex to the frame of the body.
![]()
2. The Scapula
Next is the scapula, also known as the shoulder blade, or sometimes called the scap.
The scapula hangs off the end of the clavicle and against the rib cage, held in place by 17 different muscles. Those muscles act as guide-wires, pulling the shoulder blade into various positions.
On the outer corner of the triangle is the insertion point for the arm bone and what most consider their shoulder socket.
![]()
Before moving onward, move your shoulder blade around a bit. Notice how the arm moves along with it. The term used to describe how the scapula and arm move together is scapulo-humeral rhythm. The key word rhythm describes the movement of two things in synchrony.
This is all too important for the shoulder. The scapula and arm must work together as a team, otherwise, it’s just a half working shoulder. What I’m getting at, is your fix for shoulder pain, or building arm strength, must include the muscles that move the scapula as well.
3. The Humerus
![]()
And finally, we’re at the true shoulder, and where most locate their pain. The arm bone (or humerus) attaches to the shoulder socket via a ball, hence the phrase ball and socket joint.
However, the ball of the arm bone is much larger than the socket, often described as a golf ball sitting on a tee. The advantage of this is movement! The shoulder isn’t bound up but can move freely in many different directions.

The Shoulder Trade-Off
In summary, the shoulder is highly capable of movement.
It can go fast, for things like throwing, or it can exert force in many ways for things like lifting weights or carrying bags of dog food, or it can be very precise to catch something tossed your way.
Compared to the hip, it’s much less clunky. Free to wave around like those tube dancers that jive in front of used car lots.
As with anything, though, there is a trade-off. And despite the luxury to move in so many ways, it brings about a problem of holding it all together, and actually where many problems creep in for the shoulder.
Holding it Together
The bones of the shoulder are held together by a combination of tissues that are classified as either static or dynamic stabilizers. What I like to describe as tape and rubber bands.
The tape describes the static stabilizers. Things that don’t move and aren’t all that stretchy. They do a good job of holding things in place. The most talked-about static stabilizers are the ligaments and the labrum of the shoulder.
We won’t talk much about the static stabilizers other than you can’t do much to change them and they don’t repair themselves. So when things go wrong, you’ll need to focus on the things that you can change (i.e.- the rubber bands.)
The rubber bands are the dynamic stabilizers that are muscles and their tendon attachments. They hold things together, but also lengthen and shorten to make the arm move.
The dynamic stabilizers can be strengthened and trained to improve their function, and are the primary target of a rehab program.
Therapy & Movement of the Shoulder
In an era of limitless information on the internet, it is easy to get sucked down a rabbit hole looking at all the structures that could be contributing to your shoulder pain. Pretty soon you might feel overwhelmed with all the areas to stretch, strengthen, mobilize and get treated by any number of “professionals”. The process can be exhausting, confusing, and even scary at times.
But like most things—You can’t believe everything you read on the internet.
Healing is largely a natural process that the body is designed to do without needing the perfect prescription of exercises. For most conditions, the pain will go away if you stop irritating it.
The thing is, if you appropriately screen all the red flags, strength and mobility are likely to take care of 90% of basic shoulder pain issues. It is really that simple. Give your body the opportunity to heal and work on mobility and strength— your body will take care of the rest.
We are going to show you how to do this on your own as a self rehab program, but first take a look at the different ways the shoulder moves.
Small Movements
Now let’s break this all down a bit more. Have you ever noticed even if you have a “shoulder issue” that some movements are actually just fine?
Small movements that mainly occur below shoulder height like picking up your cup of coffee, or typing at your desk feel ok but bigger movements like reaching up overhead seem to set your shoulder off a bit more? This gives a lot of information into what might be going wrong.
When making a small movement when your arm is close to your body it mainly happens by the ball of the arm moving in the socket. These actions rely on the four smaller shoulder muscles around the joint called the rotator cuff.

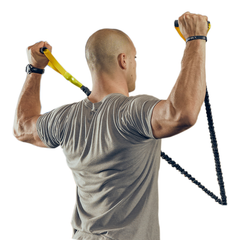
Big Movements
Now things get a bit more complex. As movements progress away from the body or overhead, it requires more moving pieces.
For things like washing your hair, reaching into the backseat of the car, or opening the overhead bin on an airplane, only so much can happen with the ball moving around the socket. To achieve the extra range of motion, the scapula needs to move simultaneously and in sync with the arm to free up additional ranges of motion and your rotator cuff has to keep the ball in the socket.
In order for your arm to create these bigger movements your shoulder blades need to move and create a foundation to support the load. Several muscles pull from opposing sides to pivot the scap for this action to happen. Moving the scap aligns the shoulder blade with the elevating arm bone and creates a stable support structure for the arm.
So not only do you need your shoulder blade to move well (while being stable) you also need the rotator cuff to be working in different directions. So big movements create more complex needs from our bodies.
Another reason to explain why sometimes small movements feel OK but big movements when your arm is up and out can be more painful or take longer to heal—it is a combined movement that needs a few layers of strength and stability.
![]()
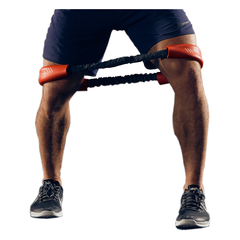
Even Bigger Movements
What about moving heavy weight, pull-ups, and throwing fastballs?
Everything we've mentioned so far creates a foundation of strength, function and control for adding the additional pieces needed for high-performance. If you have proper synergy of the scapula moving through a full range of motion, and the rotator cuff effectively keeps the ball in the socket, the rest relies on proper form and strength of the prime movers.
Those are the workhorses responsible for strength and power. These are the muscles we hit in the gym—things like the pecs, deltoids, and lats.
![]()
Summing it Up
Working the remote or eating cheeseburgers doesn’t require too much from the shoulder. If this is your only goal, there probably isn’t much reason to worry. But to have an active life, as you can see, there are lots of working pieces that need to be strong and coordinated.
So when pain pops up, it’s usually because your strength or mobility isn’t meeting the demands. Future articles in this series will apply this understanding of shoulder anatomy and movement to explain the many shoulder breakdowns, how pain flares up, and put you on a path to fix it.
But before you begin, take the Red Flag Shoulder Screen to check for more complicated issues that need to be addressed by a medical professional.
Once you confirm that you’re all set for self-rehab, you can learn more about the different shoulder pain issues, or jump straight to one if you already have a diagnosis.
Chapter 2:
Shoulder Pain Assessment

Chapter 3:
Shoulder Impingement

There is a common cause of shoulder pain—and there’s a good chance it’s the reason your shoulder hurts.
A condition called shoulder impingement syndrome.
It can also go by names like:
- subacromial impingement,
- painful arc syndrome,
- supraspinatus syndrome,
- swimmer’s shoulder, or
- thrower’s shoulder
And in the medical world shoulder impingement will sometimes get defined by the pathology of what’s actually hurt. Things like rotator cuff tendonitis, biceps tendonitis, bursitis, or other medical ‘itis’ words.
It’s one reason why people get so mixed up about their shoulder pain. There are a lot of words, all describing the same thing!
What is Shoulder Impingement?
Take a quick review of your shoulder anatomy (which you can dig into this a bit more HERE), for an important structure to point out.

There is a small gap in the shoulder called the subacromial space. And Inside this space are muscles, tendons, and sacs of lubricating fluid.
For a long time, we considered the acromion to be the primary culprit of shoulder pain. It was observed as a nasty hook that would grab onto and rough up tissue in the shoulder, to the extent that shaving or cutting the acromion became a common procedure. But we’re now cluing in that “shoulder impingement” is actually supposed to happen, and with all shoulder movement, the tissues naturally glide between the bones of the shoulder.
But if it’s normal, then why does it hurt?
First of all, there’s not much room for error beyond the normal shoulder biomechanics. If shoulder function is thrown off, even just slightly, it will add extra compression to the tissues in the space.
Things like stiff and inflexible shoulders are likely to decrease the subacromial space…
Or if the scapula isn’t moving with the arm correctly, it can position the bony prominence too low…
Or if the rotator cuff isn’t doing its job to keep the arm stable in the shoulder socket…
All of these things will lead to a greater degree of shoulder impingement.
If this extra compression happens while sipping a cup of coffee, it’s not likely to flare anything up (unless it’s already irritated). But consider playing tennis, or throwing a ball, weightlifting, or painting a ceiling.
It’s usually through a cocktail of shoulder mechanics, loads, speed, and volume that our shoulder ends up in pain.
Additionally, if something is irritated, it’s likely to hurt if you poke it.
For example, if you twisted your knee playing soccer, it’s likely to hurt for a few weeks if you bend it. In this example, bending your knee causes pain, but it’s not the cause of your injury.
Likewise, even if impingement is normal, if you’ve irritated something in your shoulder, it’s likely to be bothered when it’s compressed.
So the impingement pain may be in response to other shoulder issues, like rotator cuff or labrum tears, that not only increase the degree of impingement but also make the shoulder cranky when it gets pinched.
Thus, it’s too simple to say that impingement syndrome is caused by the compression of the tissues inside the shoulder. Because by itself, that’s what’s supposed to happen.
Although the diagnosis…
Desk-job-stiffness-with-mild-rotatorcuff-fraying-and-lot-o-push-ups-itis
is a hard one to say, so we’ll stick with shoulder impingement.
Tests for Shoulder Impingement
There are lots of assessments used to determine if someone has impingement syndrome.
A very simple one for someone to do on their own is to reach across the body and put the hand on the opposite shoulder. Then lift the elbow towards the face and check for pain.

There is another assessment called a painful arc test.
For this assessment, lift the arm up away from the body, into an overhead position. If there is pain between 60 and 120 degrees this is a positive test.

Which leads us to the next question…what to do about it?
Fixing Shoulder Impingement
If you want to fix your shoulder impingement, there are two big steps in order to get you there, which both involve lessening the degree of impingement.
The first is to lighten the stress on your shoulder, By reducing the loads and volume on your shoulder, the shoulder impinges less and allows for some healing. The best guide for this is to simply eliminate any painful movements. This should make sense, but many continue to push through pain, which only makes matters worse. As a general guideline, give it 2 good weeks of good shoulder rest.
Although the first step is for nothing without the second one—it’s critical and often missed or ignored.
The second step involves building shoulder strength and mobility. This not only improves shoulder mechanics for less impingement but progressing through pain-free movement is an important part of getting past your brain’s perception of pain.
These are the underlying principles of our 30 Day Shoulder Fix.
In this program, we walk you through a 30-day rehab program, designed to fix your pain and improve your shoulder strength and mobility, so that it never returns. But it’s not always the right fit for everyone.
In case you missed it, be sure to use our Red Flag Screen to determine if shoulder impingement is likely the cause of your pain and if our self rehab program is right for you.
Chapter 4:
Rotator Cuff Tears

Rotator cuff tears are common. Around 250,000 will be surgically repaired this year, and a couple million more will be treated via more conservative measures—ranging from rest, pain meds, injections, and therapy.
But get this…
A whole bunch of people will live with a rotator cuff tear and don’t even know about it. It’s believed that 25-40% amount of people will carry on their life pain-free. And that’s not just minor rotator cuff issues either. It’s shown that roughly 25% of people over 60 have full-thickness rotator cuff tears, which goes up to 50% for people in their 80s (ref).
The big question is, especially for those struggling with shoulder pain or potentially diagnosed with a cuff tear, what’s the secret to living through this injury pain-free?
We’ll address it plus more and put you on track to pain-free living.
Anatomy
Let’s start with a general understanding.
The rotator cuff describes the four muscles that create a ring of support for the arm bone in the socket—it establishes a cuff around the humeral head. These are often called the SITS muscles by exercise science students to remember their names as an easy acronym.

Although, this simple picture presents some misconceptions about the rotator cuff and how a tear occurs.
The first is a belief that tearing your rotator cuff is like splitting your pants. And while sometimes, it is this dramatic, a sudden tear like this requires a large amount of force to occur. The more common tear occurs over a lifetime, more like wearing a hole in your pants over years of use.
The next belief is that a rotator cuff tear will be forever limiting. The rotator cuff, along with other muscles, works together by combining their actions to keep the arm correctly placed in the shoulder socket—allowing it to roll, slide, and glide as needed.
This community effort is more evident by looking at a dissection rather than an anatomy illustration. There is continuity to the rotator cuff, which, to borrow from physical therapist Adam Meakins, secures the shoulder more like a large flat blanket.

(Source: Jorge Chahla)
The redundancy to the shoulder causes muscle groups to have overlapping jobs. If one of the muscles has a tear, there are still other ways to get the same motion. Improving the ability of different muscles to help with the job is how people live with tears unbeknownst to them and why progressing through a strengthening plan often works exceptionally well.
The important take-home is that while many considerations surround each person’s injury, not all rotator cuff tears need surgery!
The Cost of Surgery
If faced with the decision to rehab a rotator cuff tear or have surgery, most would do their best to avoid the latter. But still, it may seem appealing to bite the bullet and get it over.
Although there are several reasons why surgery is not the best option, some of which are obvious.
The top of many lists is that surgery is costly. Even with excellent health insurance, it will likely cost a few thousand dollars to cover the surgeon, anesthesiologist, surgical center, post-op therapy, and follow-up, plus many other add on costs. There is the expense that occurs from lost time from work and the overall disruption of your life.
After the cost, rotator cuff surgery requires a lengthy recovery. Expect a sling for about 6-weeks with some uncomfortable sleep, and then another 4-6 months to make a full recovery.
Beyond the expense, discomfort, and inconvenience, many aren’t aware that rotator cuff surgery often fails, and the tendon becomes re-torn (ref).
And even if the surgery is successful, a fix isn’t guaranteed like nothing ever happened. Many have stiffness, loss of mobility, and complain about a shoulder that doesn’t perform like it used to.
Due to these things, and the potential for success, a rehab plan is a great first step for many rotator cuff tear.
A Plan for Your Rotator Cuff
Now, in case you didn’t know, we sell a shoulder program that has been used by many to rehab their diagnosed rotator cuff tear, even after they’re told that surgery is the only option. So, yeah, we’re invested in getting you to go the route of NON-surgery, but I assure you that it’s more important to us than making a few dollars.
Allowing people to overcome their pain without the cost, pain, and risks involved with surgery is just as vital to us and as fulfilling as building a successful business.
Still, it would be unethical if the possibility of rehab wasn’t there. There is plenty of research and support in the medical community that the mere surgery process is a long route to the same end.
Consider what surgery leads to: forced rest and the treatment of inflammation (ice, anti-inflammatory medication, etc.,) then slowly reintroducing range of motion, then a carefully designed progressive return to strengthening exercises.
This process is likely the MOST impactful part… not even surgical repair.
What success would you have if you did all of those things and expected slow progress over 4-6 months without repairing the rotator cuff? It’s hard to say and remains disputed because, not surprisingly, nobody wants to get the sham surgery in a research study for their rotator cuff repair.
With that said, there are situations in which shoulder surgery has proven to be the best first approach. Generally, younger people with traumatic cuff tears should at least get it medically evaluated for the need for surgery. Meaning, if you took a nasty fall, resulting in a prominent, “Oh, crap” moment (especially under the age of 40), first see a sports medicine professional on the approach.
But suppose your pain was a gradual onset or started as just a twinge during a typical physical activity (like lifting a suitcase or even pumping heavy iron). In that case, a therapy plan is a great first approach.
With these cases, your body has had some time to build support structures in the form of scar tissue and strength from other muscle groups. With some time and focused strength and mobility work, you can further this support structure and most likely resolve the pain and return to one-hundred percent again…without the pains of surgery.
The Risk of the Conservative Approach
The question then is what the downside of a conservative approach is?
The biggest fear is that your shoulder will end up worse off. But the evidence shows that six weeks of physical therapy yields a very low risk of worsening things.
Regarding the time delay, it takes six weeks from initial evaluation, to an MRI, to follow-up, and then getting in for surgery. So don’t fret that your arm will end up worse if you’re not rushed off for an operation.
There is also concern that loading up an injured shoulder can only make things worse. But as mentioned earlier, this is important to the healing process by building a support structure around the tear.
Although, merely taking time off and then jumping back into things or pushing through the pain are not reliable strategies. The rehab process requires steps in which you restore mobility and progress through pain-free strengthening.
And please keep one thing in mind during the rehab process…
Be patient and give it your full effort!
Our bodies are DESIGNED to heal, yet if you expect to put in a few weeks of work and then be perfect, you’ll likely be disappointed. In many research studies, people get counted as “failed conservative attempts” at the 6-week mark, but what does it mean to fail?
A lot has to do with meeting the patient’s expectations set at the rehab program’s onset. When the sports med doctor throws out 6-weeks, many start a countdown clock to the day they’re good as new.
At 6-weeks, you might not be perfect, but that doesn’t mean that the rehab was unsuccessful. It’s merely a time to reassess how things are going and determine if it’s necessary to take different actions.
The Crossover Approach
Now we must evaluate the plan, which we discuss in-depth in our article: The Approach to Shoulder Pain
But the big priority for the plan is rest to allow for the resolution of inflammation around the injured area. However, if rest is interpreted as do nothing, it will not lead to success.
The better term is relative rest, which entails an active approach to improving your shoulder strength and mobility while avoiding things that might make it worse. Not only does this help build the necessary strength and stability to overcome the injury, but it keeps an athlete or active person from losing their mind during the rehab process.
Quite often, rehab’s downfall occurs when a person rushes back to things as they start to feel better.
We created our 30-Day Fix program with this in mind. With the help of our education and training, you can navigate the process of relative rest with something you can do every day to help improve your shoulders.
Along with progress checks based on what your shoulders can do without pain, you will progress back to full capacity.
You can follow this alongside your physical therapist’s guidance for a home program that will improve your outcomes. But many have had success using Crossover Symmetry alone, which we would be happy to support with the help of our medical team.
If you have questions about a rotator cuff tear or shoulder pain in general, please reach out at support@crossoversymmetry.com, and we would be happy to help!
Chapter 5:
Shoulder Labrum Tear
A labrum is a structure in the shoulder that's prone to injury.
To understand why, take a second and observe the shoulder. We covered this issue with shoulder anatomy in the Intro to Shoulder Pain Rehab, but we'll reemphasize it here again.
The ball is 3x the size of the socket. It's more like a ball on a tee than an actual "ball and socket."
It's not all that stable, but the shoulder does have excellent mobility.
Now, sandwiched between the arm bone and shoulder socket is the labrum.
Most specifically, it encircles the shoulder socket and performs several important jobs, including:
- Deepen the socket to support stability,
- Provide an attachment to anchor ligaments and tendons,
- Create a negative pressure to further stability—think of it as a suction cup.
In summary, the labrum provides extra stability for a joint needing help.
In this article, we'll explore the labrum further, especially related to pain and injury, and shine some light on how to fix issues related to a torn labrum.
But spoiler alert…the labrum doesn’t fix itself.

Labrum Injury 101

Sometimes, that failure is due to an accident—like falling on an outstretched arm or a lift that went wrong. This forces the arm bone into the labrum ring, causing it to tear.
Sometimes, the forces are so great that the shoulder dislocates. A labrum tear is almost guaranteed in these cases, resulting in a Bankart lesion.
The labrum can also be injured by pulling on it. Notice in the picture how the bicep tendon attaches to the upper ring of the labrum. Stress that pulls on this attachment can peel away the upper part of the labrum ring, causing what's called a SLAP tear.
The SLAP tear is extremely common in baseball players due to the extreme layback that occurs as part of the throwing motion. It can also happen from dropping down hard while hanging onto something (see: kipping pull-ups.) A SLAP tear can also occur due to a hard blow to the shoulder.
Either way, when the labrum tears, it leaves behind an issue of both pain and lost stability that must be dealt with, and this type of tissue doesn't regrow, so just taking some time off will not "repair" the issue.
However, that doesn't mean that all hope is lost and you're destined for surgery.
Next, we’ll cover the follow-up to a labrum injury.

Diagnose a Labrum Tear
If you dislocated your arm while hucking off jumps at the terrain park—or maybe something slightly less awesome—bet on a labrum issue.
This may follow up with a feeling that the shoulder will dislocate again. If your injury was related to an accident like this, it deserves a medical evaluation.
But sometimes, it's not so obvious, especially with SLAP tears.
Here are the signs and symptoms that you may have damaged your labrum:
- Pain. Often deep and hard to pinpoint, with the feeling that it's too deep to touch.
- Catching/clicking
- Pain with overhead activity
- Decreased force production on that side
- Sometimes a loss in shoulder range of motion, especially with internal rotation (turning the arm inwards)
In the clinic, a PT or sports med doctor has lots of special tests to diagnose a labrum issue. You could search for them, but no one test will check yes or no.
It's a system of ruling out other pathology, manual assessment, and patient information to create a complete impression.
If you need assurance, you should get an evaluation with a specialist to feel more confident moving forward. However, it's not ridiculous nor harmful to initially work on a home fix for a suspected torn labrum with a program like Crossover Symmetry.
Now, we'll show you how.
The Labrum Fix
As we mentioned earlier, the labrum doesn’t repair itself. So what kind of hocus pocus might we recommend?
The answer is a conservative plan of strengthening and some rest.
Which isn’t actually a cure, because the labrum remains torn, yet have no fear! You can still be healed.
First of all, labrum tears rarely happen in isolation. Due to instability caused by the torn labrum, or potentially the underlying issue that caused the labrum tear to happen, things such as bicep tendinosis, rotator cuff impingement, and bursitis can pop up as well. These are pain generators that will usually go away if you stop poking them.
Secondly, strengthening the muscles can make up for the loss in stability, restoring function as before. To support this, a 2016 study showed that 72% of people over the age of 40 had a SLAP tear that was pain-free.
If you’re unconvinced, it’s been estimated that close to 80% of major league baseball players have some degree of labrum tearing. Showing that it’s possible to buffer a labrum issue well enough to sustain the forces required to play a pro sport.
Labrum Fix Using Crossover Symmetry
There is a good chance you can too, with a simple prescription:
- Avoid things that are painful for at least 30 days. If you keep provoking your pain, it’s not going to get better.
- The “protocol” for a labrum tear would follow the same principles for approaching other shoulder issues. Work on restoring range of motion and improving the function of the scapula and rotator cuff muscles in all planes of motion.
Even if you don’t have a labrum tear, you’re still taking the steps in the right direction for fixing whatever shoulder ailment that pains you. Most important to the process is that the program needs to be consistent with daily compliance.
It doesn't have to be extensive, but it does need to be done regularly.
More Advanced Treatments
Give it 30 days and if the pain is still limiting your progress, high dose NSAIDs or corticosteroid injections are an appropriate option.
You’ll feel good after an injection, but don’t sit around and assume everything is fixed. Instead, it’s important to use the relief to address strength deficits.
As an athlete progresses past the basic rehab template, more advanced movements may be necessary to take on the specific stressors that will show up as part of their sport. In the end, nearly 70% of athletes have good outcomes with pain relief and return to sport through conservative management (ref).
If after 4 to 6 months, there has been no improvement despite a consistent effort with a conservative approach, it’s time to consider more advanced medical procedures.
Imaging may be ordered, but an MRI is not great at picking up all SLAP tears, so an MRA may be ordered for a more accurate assessment.
The final approach is arthroscopic surgery, which follows up with a 6 to 9-month recovery. The bicep tendon is often relocated from the superior labrum to lower on the arm during the procedure as well. This is called a bicep tenodesis and tends to have less pain and reduced risk of the repair failing.
Conclusion
Whether you are a weekend warrior, throwing a baseball in the Majors or working to get to the CrossFit Games, a torn labrum is not a career-ending injury. It may disrupt training and competition for a few months, but the majority of labral tears can be addressed successfully with non-operative care.
Take this as a reminder to continue your active participation in your shoulder health. This includes a plan for warming up the shoulder, accessory work, and sport-specific training.
Click Here to learn more about the Crossover Symmetry rehab approach and how you can maximize your shoulder health despite a labrum tear.
Chapter 6:
Shoulder Separation

If you’ve got lingering shoulder pain following a nasty fall or direct blow to the shoulder, made worse by reaching across your body, you may have suffered a shoulder separation.
This is caused by the stretching or tearing of the ligaments of the AC joint. It’s a common injury among hard-hitting sports like football, rugby, and hockey. Or it also shows up in everyday life due to an unfortunate accident.
While they can be painful injuries, that cause swelling and an odd looking shoulder, most will progress with time and guided therapy. In this article, we’ll take a look at the types and plan of attack to help you get past your shoulder separation.
Know Your Grades and Recovery Timeline
Before going any further, let’s identify what’s going on.
Start by locating your collar bone and then trace it to where it meets your shoulder. You’ve found your acromioclavicular joint, or better known as the AC joint.
Notice the collection of ligaments that hold it all together. It’s the tearing or stretching of these ligaments that cause a shoulder separation.

There are six categories of shoulder separation based on the size, structures involved, and type of displacement,
Grades I and II

While they are painful and may present with swelling and a bump over the shoulder, they most likely don’t need surgery. They will return to normal within a few weeks to a couple of months with rest and exercise.
What to expect:
- Grade I tears will need 1-2 weeks out of activity
- Grade II tears anywhere from 3-6 weeks.
Grade III

Grade III separations involve the tearing of the coracoclavicular ligaments as well. This causes a complete separation of the clavicle and shoulder. These are easy to spot by a stair step that is formed over the shoulder.
It’s a more complicated issue because there isn’t consensus within the medical community on the best way to manage a Grade III tear. Even with new surgical procedures, the outcomes are nearly identical with and without surgery.
So it’s logical to approach a grade III tear conservatively to avoid the expense and potential complications of surgery. But individual factors such as goals, competitive level, and sports activities need to be weighed as well.
This makes a consult with an orthopedic specialist worthwhile to determine the best course of action.
What to expect:
As mentioned, there isn’t a consensus on the best treatment for a Grade III separation. The standard procedure is 3-weeks of rest and rehab and then consider surgery if there is little improvement.
The rehab process is like the grade I and II separations, yet may demand up to 3 months before a return to activities. It may also need more intensive strengthening to make up for the loss in stability. Again, another reason to get medical help for these injuries.
Grades IV, V, VI
The later grades (IV-VI) are less common and much more severe and usually caused by major impacts like car accidents. They are more advanced medical cases or even sometimes medical emergencies. These will need surgery and don’t fall into the scope of this article.
Shoulder Separation Treatment Guide
If you want a general understanding of the treatment approach to a shoulder problem then read The Approach to Shoulder Pain. It’s a nice overview of the plan of attack, although the rehab for an AC Separation, depending on the severity your rehab may look slightly different from our normal 30 Day Fix.
More specifics on shoulder separation rehab use the following treatment guide as a tool. This is directed at Grade I and II tears, anything more severe get it checked out.
1. Screen
If you suspect an AC separation start with a screen for more advanced issues. A quick run through our Red Flag Screen is a good start to pick these things out.
This is designed to identify things that need further medical evaluation. Click here to take the screen: Red Flag Screen.

If nothing turns up there’s a good chance you can manage this on your own. But if you’re ever in doubt, rest easy by seeing a doctor about your issue.
2. Address Pain
Start by addressing the pain. Because you don’t want to live in misery, but it will also get you moving quicker, which is important to the recovery process.
In the first few days, if you’re uncomfortable, try wearing a sling to ease some stress on the joint. Most people don’t require the use of a sling, but if you are really struggling with pain, this may help in the initial few days. But you want to ditch the sling as soon as tolerated.
Ice is another good analgesic that will help with the swelling. If you visited a doctor, pain medications would probably be recommended, but for this self-treatment guide, that’s under your own discretion.
3. Movement
It’s important to start working on restoring movement as soon as possible following an AC joint injury. This will help speed up the return to activity and avoid other shoulder complications.
Initially, if you’re in significant pain or too afraid to move your shoulder, start with the basic pendulum exercise to help restore range of motion.
Otherwise, you’re good to go with basic rotator cuff work and scapula stability exercises below shoulder height.
When dealing with an AC tear, reaching across the body and overhead are the most aggravating motions, but basic pulling movements are usually ok. For this reason, the Crossover Symmetry program would not be appropriate at first, but you can still use the equipment to do go through your recovery work.
Use the following recovery program 2-3 times per day to help maintain rotator cuff function and scapular movement. It’s also important during this time to maintain thoracic mobility with foam roller mobilizations and side lying thoracic rotations.
Week 1 –
- Start with the pendulum exercise if needed
- 2 Sets of 10-15
- Prone Scap Retraction
- Prone Single Arm Y in a pain-free range
- Banded rows at the side from a single attachment
- Banded ER and IR in a pain-free range
Week 2-
- You should have ditched the sling and pendulum exercises at this point.
- 2 sets of 10-15
- Banded rows at the side from a single attachment
- Banded reverse fly from a single attachment
- Banded ER and IR in a pain-free range
- CS Scaption exercise to shoulder height
- 5lb Shoulder Press
As pain decreases and range of motion improves start returning to your normal activities and use pain as your guide. Pain should be less than a 3 on a 10 point pain scale and should return to baseline within 2 hours following exercise or your activity.
As functional range improves, you will progress into the full Crossover Symmetry activation program to prepare the body to return to normal activities.
Week 3-
- Progress to the full Crossover Symmetry Activation program. Start with a lighter resistance if needed.
- Start integrating sport specific training but stay away from contact.
Week 4-
- Continue with Crossover Symmetry Activation.
- Return to contact sports if pain-free, but go through 2 full practices before returning to competition.
Long Term Recovery
Most shoulder separations return to full activity without any long term complications.
Although there are some cases of ongoing nagging discomfort. For example, a study at the US Naval Academy shows 9% of Grade I tears and 23% of grade II tears continued to have pain that limited activity three and a half years later (ref).
A concerning statistic for anyone with an AC separation, but it highlights the need for ongoing care.
Continuing to promote scap movement and rotator cuff strength will help support and lessen loads placed on the AC joint. For that reason, don’t give up on the Crossover Symmetry program once you are “healed.”
Using CS Activation daily will support the long term care for a number of shoulder issues for whatever your sport or activity might be.
Chapter 7:
Frozen Shoulder
The most frustrating part of frozen shoulder isn’t just the pain—it’s the timeline that can stretch on for months or even years, with little way of knowing the prognosis.
That uncertainty is where having a plan matters.
An exercise system like Crossover Symmetry can play an important role in recovery, but frozen shoulder is more complex than simply “do these exercises, and you’ll be fine.”
Let’s break down what frozen shoulder actually is, what the research supports, and how to manage it intelligently at each stage.
What is Frozen Shoulder?
Frozen shoulder, also known as adhesive capsulitis, is caused by inflammation and thickening of the connective tissue that surrounds the shoulder joint. The underlying causes remain uncertain and even sometimes appear out of the blue.
That said, frozen shoulder is more common in:
-
People with diabetes
-
Individuals who’ve had prolonged shoulder immobilization (often after injury or surgery)
-
Women, particularly during peri-menopause and menopause
There’s also growing evidence suggesting low-grade systemic inflammation may play a role (ref).
Here is a rough timeline of frozen shoulder, which is broken into 3 phases: freezing, frozen, and thawing.
- Freezing (2-7 months) – During this stage, the shoulder is typically painful at end ranges of shoulder movement in all directions and often very painful at night.
- Frozen (4-12 months) – At this time, stiffness primarily limits the shoulder. There may still be some pain but it’s less than experienced during the freezing stage.
- Thawing (5-24 months) – The thawing stage is the light at the end of the tunnel, albeit it may be a long tunnel. There’s typically minimal pain and a progressive improvement in range of motion.
Depending on where you’re at in the process you’ll have different directives for treatment.
Getting Past Frozen Shoulder
The good news is that 90% of people with frozen shoulder will recover with conservative management strategies like exercise and stretching (ref). However, it can be a long and frustrating road, especially for the active individual.
Here we’ll highlight the current best practices in dealing with frozen shoulder and help identify the best strategies for getting past it, and more specifically how Crossover Symmetry can support this plan.
During the Freezing Stage
In the early stage of frozen shoulder, the primary issue is pain.
NSAIDs and other oral steroids can be somewhat useful during this initial “freezing” stage. They don’t provide a significant change in the overall recovery or duration of symptoms but do offer moderate pain relief. It’s worth noting that long-term use of NSAIDs and oral steroids is linked to stomach ulcers, weight gain, and has adverse effects on the liver and kidneys.
Another option shown to be more effective in the early stages of freezing is corticosteroid injections. During this early stage, a cocktail of corticosteroids alongside a high-volume dose of saline and localized anesthetics offers promising results. Other than a slight risk of infection, the side effects are few, and it has better long-term pain reduction.
During this time, aggressive stretching is counterproductive, but gentle, light exercise within your pain-free range is beneficial. An exercise program like Crossover Symmetry is recommended, but stick with exercises that you can perform with little pain and without having to compensate too much to achieve an adequate range of motion.
The best Crossover Symmetry options are usually:
- Row
- Pull-down
- Reverse fly (with a modified range)
- Scaption (just to shoulder height or pain limitation)
During the Frozen and Thawing Stages
Unfortunately, despite one’s best efforts during the freezing phase, most will spend some amount of time in the “frozen stage.” During this time, pain usually decreases, but the shoulder remains stiff, and the range of motion is limited. Because pain becomes less of an issue, injections and other pain relief agents are not as effective.
Instead, the focus transitions to more aggressive stretching and physical therapy.
Eventually, stiffness will decrease, and individuals will note improved range of motion and only slight pain. These changes mark a progression to the “thawing” phase. Strategies encouraged during this stage include more aggressive stretching, physical therapy, aerobic exercise, and basic strength training.
So keep up with Crossover Symmetry as your range of motions allows, even trying the Strength program as mobility improves. This will help to limit the limitations caused by frozen shoulder and improve strength as you work through the issue.
When Conservative Care Isn’t Enough
Despite injections, physical therapy, and pain medications, some will need more advanced treatment. If pain and limited range of motion persist for more than 6-9 months, more advanced medical procedures may be indicated.
These are invasive protocols that aggressively attack the contracted shoulder tissue using anesthesia to sedate the patient and then manipulating the shoulder, or more popular these days, is arthroscopically cutting the capsule.
These more advanced methods do show good results, but create lasting changes to the shoulder structure. Therefore, these options are a last-ditch approach to treating the condition, especially for one who hopes to return to more strenuous activity.
Crossover Symmetry for Frozen Shoulder
Unfortunately, there’s no slam dunk for a frozen shoulder.
There is a lot that remains unknown, paired with the fact that each episode is unique, so what works for one may not help the other. Although what we do know is that movement is an important part of the recovery process for any ailment.
Specifically for frozen shoulder, here is a quick take-home summary of a plan to help you get past the issue using your Crossover Symmetry System.
Frozen shoulder has 3 stages:
- Freezing – The primary issue is pain with some restrictions in range of motion. Corticosteroid injections and high-volume injections may be useful during this stage. This is not the time for aggressive stretching or strength training, but some light use of Crossover Symmetry exercises is beneficial for reducing the pain and limitations.
- Frozen – Some pain may still be present but a loss in a range of motion is the primary limiter. More aggressive stretching and a shoulder strength program like Crossover Symmetry (but with modifications for the limited range of motion) are important during this stage.
- Thawing – In the final stage, the shoulder range of motion progressively improves and pain is usually minimal. Keep up with aggressive stretching and you can progress your resistance training within your available range of motion.
Read on about how Crossover Symmetry can fit into your treatment plan with The Approach to Shoulder Pain
Chapter 8:
Stress, Pain, and Stiffness

We get comments like this all the time…
"There are always knots in my traps"
or…
"My traps are super tight, and I cannot stretch them enough"
Along with these complaints, there's also stacks of research implicating the upper traps as the driving force behind shoulder pain.
But we should stop thinking of the upper ‘Trap' as a four letter word.
It's not the bad guy in the relationship… It's just misunderstood!
This article will shine some light on this common complaint, and give you a better plan to fix the issue.
First…What is the Trapezius?
The trapezius has 3 distinct groups of muscle fibers that align in different directions. This divides it into upper, middle, and lower sections.
Based on their origin, insertion, and fiber orientation, when working alone (no muscle ever works in isolation, but muscles do play more dominant roles) each section plays a different responsibility in stabilizing and moving the scapula. Considering individual muscle actions:
- The Upper Trapezius elevates the scapula, which creates a shrugging motion.
- The Middle Trapezius retracts the scapula, or squeezes the shoulders blades together.
- The Lower Trapezius depresses the scapula, which pulls is the scapula down.
But often left unrecognized, is how trapezius works synergistically with other muscles to produce more complex movement patterns. For the trapezius, it's got an important role in rotating the scapula upwards. Essential to any action that requires lifting the arm.
See below how the upper trap, lower trap, and serratus anterior work together to pivot the scapula. This is important to maintain space within the shoulder joint (i.e.-avoid impingement), but also create a stable position for the arm.

Related to this balance, the upper trap is often blamed for overpowering the balance of the other shoulder stabilizers (ref, ref), which leads to shoulder pain and faulty movement of the scapula—a condition called scap dyskinesis.
Dealing with Pain and Stiffness
Pain and stiffness of the upper trap is a common complaint, often paired with high stress and long work hours.
Notice that any mall or airport these days has a booth staffed with massage therapists ready to work on those tight trap pain points.
The underlying issues behind this pain and stiffness is diverse, not to mention complex and controversial, which we will almost certainly tackle in future articles. But for now understand that the unpleasant sensations are perceptions.
They're formed by messages traveling to the brain from the body, which the brain then translates into feelings of discomfort, tightness, or pain.
Techniques such as massage, foam rolling, and stretching can effectively alter those perceptions. Which is a good thing, because it often means relief from nagging discomfort.
However, these are usually temporary changes, that don't necessarily address the stimulus—leaving pain to return once again later on.
The point being, if you've had a long and stressful work week, find some relaxation with a massage. Or if you're feeling tight after a long flight, a massage ball may be useful.
But if these are regularly scheduled things to deal with chronic pain and tightness, you're barking up the wrong tree.
It's time to look at the underlying causes to the recurrent problem.
Carrying the Load
The usual suspect for the faulty upper trap is the everyday desk posture, which can mean that can be either shortened or lengthened for hours at a time. Or heavy workouts can make the traps knotted and sore, especially if they include an overload of heavy pulling exercises.
While correcting posture and workloads can lessen the symptoms, there are bigger and often unaddressed things underlying the issue….
That is the the upper trap has a weak supporting cast.
As discussed earlier, the action of the upper trap combines with the serratus anterior and lower trapezius to create upward rotation of the scapula.
The serratus anterior and lower trapezius are notoriously weak and lack proper neuromuscular control. With these muscle groups underperforming, something has to step in to carry the load. That is the upper trapezius, which must overwork to makeup for the inability to create upward rotation.
So rather than continuing to hammering the upper trap with mobility, try working on building a better movement system. A system where muscles effectively move together, contracting and lengthening in coordination with each other. Specifically for the upper trap, this means improving the balance for upward rotation of the scapula.
How to Create Better Balance
When working with people on Crossover Symmetry, there's often the tendency to shrug with many of the exercises. That's because the upper trapezius is doing what it's been told to do… carry the load.
The first step is recognizing that it's happening. Pause at the end of the movements, check into your position, and relax the shoulders down. At first it feels awkward or even impossible, but overtime the need to reposition will lessen. And with work, strength and motor control will improve and shrugging will be easier to recognize and correct.
In this Crossover Tip we show some some easy correctives for the shrug when using Crossover Symmetry.
But if you continue to struggle with the shrug, or find yourself in discomfort without your Crossover System on hand to fix it, here are some additional correctives to try out…
(Notes: For the Thoracic Flexion & Extension exercise work on the movement of the scapula around the rib cage).
(Notes: For the Prone Sphinx, when reaching the scapula should rotate around the body, moving under the armpit.)
(Notes: For the L-Sit, keep the sets short, but the intensity high. Drive the shoulder blades down and around the body. Rest when you feel shoulders lifting up into the ears.)
The Upper Trap Fix
So next time you feel like your upper traps are tight, skip the stretching and give them a dose of movement.
Doing things like Crossover Symmetry will work the muscles that both oppose and complement the the upper trap, which will create feedback to the whole shoulder complex to be more active where it's needed, and to relax where it's not.
And over time this new found strength and balance will lend itself to better shoulder function and the elimination of tight traps. But stop trying to stretch the problem away! The 30 Day Shoulder Fix and get you on the path to less painful shoulders.
Chapter 9:
The Approach to Shoulder Pain

"Improvise, adapt, and overcome…"
The unofficial mantra of the United States Marine Corps and an important mindset for anyone looking to overcome an obstacle….and certainly applicable to getting past pain and injury.
Let's dive into an understanding of what's needed to overcome a shoulder problem, specifically when surgery is not an option, or the last resort.
The Initial Step to Healing
It shouldn't be a surprise that continuing to hammer the same painful movements is not an effective solution for pain.
Therefore, the fundamental first step is to deload the painful tissue…best known as rest!
Although rest by itself actually a poor solution to pain!
That's because it doesn't support the most difficult part of the healing process— fighting the urge to return to max effort as soon as possible.
There's not an athlete in the world who wants to sit back while their injury heals! Watching their hard work and effort go to waste! Any effective shoulder fix must address this and get away from the mindset of rest.
Instead create compensations to maintain activity levels.
These things keep performance moving forward, while lessening the engagement of painful tissues. This facilitates both physical and psychological success to get past the shoulder pain.
Examples of compensations are:
- Movement modifications,
- Taping techniques,
- Avoiding specific painful stimuli and positions,
- and workload modifications
For more information on this, take a look at our shoulder scaling guide. It provides many effective ways to train the shoulder despite injury limitations.
Creating a Cure
As much we would like to profess to the magical band powers of Crossover Symmetry, healing is largely a natural process.
Demonstrated in a 2004 study in the Journal of Shoulder & Elbow Surgery (ref), which showed wearing a brace with activity modification was as effective as many weekly physical therapy sessions for treating shoulder impingement syndrome.
Despite this evidence, sitting back with a brace is far from the most effective healing plan. It does not address the strength, mobility, and coordination problems that may have led to the original injury.
Another look at the previous research reveals a short term study only considering pain levels, and not return to function, recurrence rates, or life satisfaction.
Thus, the next consideration for healing is remediation— derived from the latin word remediare, meaning to heal or cure.
Remediation first addresses impairments underlying shoulder issues. Correcting things like poor cuff strength, scapula control, and thoracic mobility creates a better environment for healing to happen and is essential to preventing pain from returning.
Remediation also involves gradually introducing load to painful tissue in a controlled manner. This builds the capacity to withstand the previous activity demands, beneficial to both meeting performance goals and avoiding shoulder pain recurrence.
Even structures that do not heal (e.g.-labrum, some rotator cuff tears, ligament tears) can return to full capacity through remediation. By improving strength and dynamic control of the shoulder, it removes loads and stress on the damaged area.
Many athletes can cover up their issues and continue to perform at high level despite permanent structural changes. For example, research shows up to 80% of major league baseball players continue to compete with a torn labrum (ref).
To further support this, we've seen many Crossover Symmetry users cancel their surgery and remain pain-free, despite things like rotator cuff and labrum tears.
Showing that a comprehensive plan of both compensation and remediation, known as relative rest, can alleviate most pain and keep a person moving towards their goals long term.
Healing Without A Cure
Unfortunately, some issues are beyond remediation and compensation.
A clear example would be a spinal cord injury, resulting in paralysis.
No amount of training can overcome this injury, yet adapting to the disability can restore life activities that bring joy and satisfaction.
Thus, despite a cure, adaptation is a form of healing.
Not all adaptive situations are this limiting or permanent either. For example, there are plenty of workarounds for dealing with an arthritic shoulder, or severe tendinosis which can take up to 9 months to completely resolve.
Ultimately it requires being smart with training and activities to continue pursuing goals. Whether it be adaptations around permanent limitations, or short term adaptations to stay invigorated while long term healing runs its course.
For example, it's very possible to be strong, athletic, and look great naked without doing squat snatches or muscle ups. You can go out and enjoy 18 holes of golf (and for most shoot the same score), without full swings off the tee box. And even for something as shoulder intensive as swimming, a great swimmer can be made by drilling mechanics, body position, and carefully prescribing volume.
If adapting or avoiding these movements is not an option for life enjoyment, it may be time for a surgical consult. No doubt there are situations when surgery is the best solution. It often has remarkable results that completely resolve pain and limitation.
Although surgery does have many drawbacks, it's not the solution for everyone, and should ultimately be the final approach. We get more in-depth on the decision making for surgery here: Important Considerations Before Going Under the Knife.
How to Approach Shoulder Pain
In dealing with shoulder pain, use the healing strategies outlined above.
Compensation- Find a Work Around
Remediation- Find a Cure
Adaptation- Find an Alternative
Start by creating a plan of relative rest, using a combination of compensation and remediation.
If you are following the Crossover Symmetry Shoulder Program, we help guide this in our training and education on the Training Zone.
And you can learn more about our plan here: 30 Day Shoulder Fix.
Then after 30 days reevaluate how things have improved. If pain is gone or continuing to improve keep moving forward!
If things are not getting better, this will require some self analysis to understand what's most important to you. It may be time for more advanced medical procedures, or to create adaptations to satisfy activity cravings, without wrecking your shoulders in the process.
All the best on your road to recovery, however long that may be! And if you ever need help along the way, please reach out to us at
support@crossoversymmetry.com.
